Showing posts with label Easter. Show all posts

Saturday, February 28, 2015

Egg-tastic

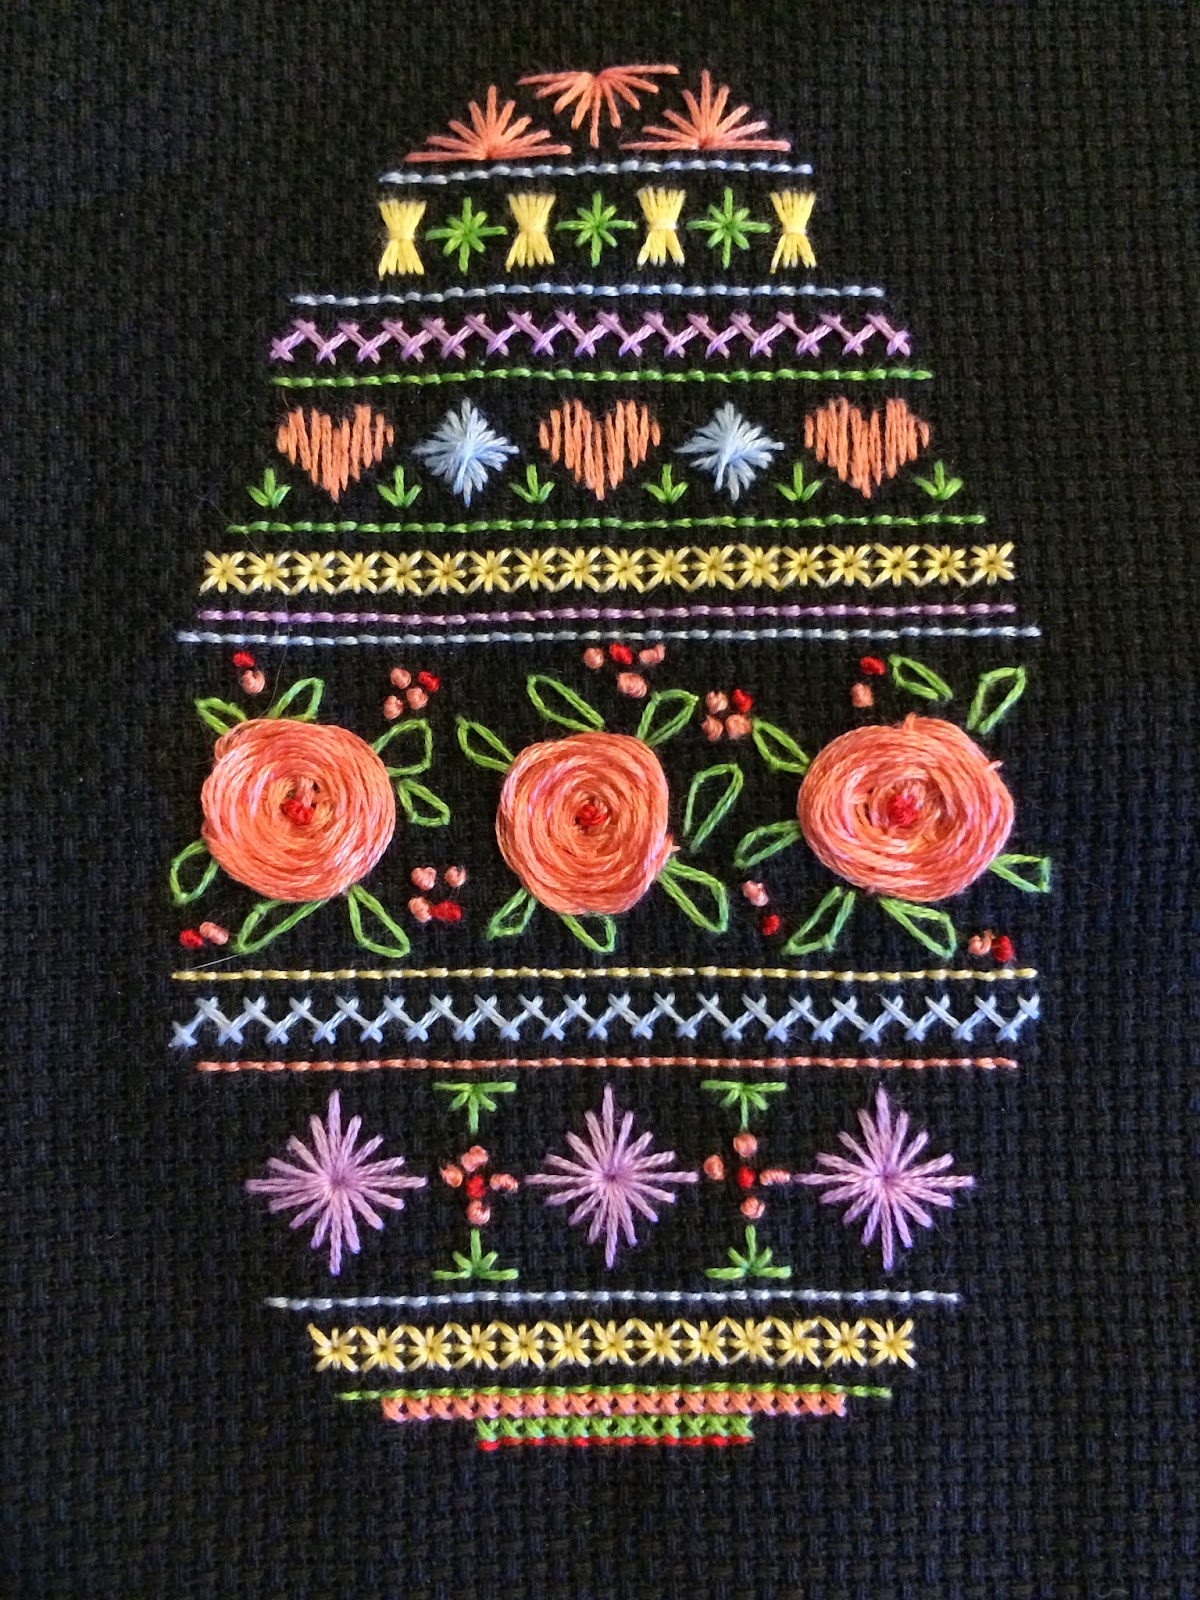
I've been working on this project for a while now. I honestly don't remember when I started it, but it ended up going into the unfinished pile.
Now that I'm home all day I have a little time for stitching. I wanted to do a Spring/Easter project and I remembered that I had this sitting somewhere. I had everything I needed to finish it, so I dug it out.

The pattern came from Cross Stitch and Needlework Magazine / March 2013
The design is by Julia Lucas


As you can see, I finished them differently. Mainly because I hate stitching in white. It always turns out bad.


This is after I finished the stitching. They are so cool looking.  I was drawn to this pattern because it was stitched on black.


finishing them into 3D eggs was a pain to say the least.
The tools I used:

1 - Styrofoam Egg
2 - Floss
3 - Pins
4 - Paper Clip
5 - Flat Head Screwdriver
6 - Pen
7 - (not pictured) Glue Stick
8 - (not pictured) Hot glue


 Step 1: Take a piece of floss and draw a line around the egg. This gives a guide so you can punch out a portion of the egg with the screw driver. You can use whatever you want to do this, I've seen it done with an exact o knife as well. But the screwdriver worked pretty good.


Step 2: Use the glue stick and glue the stitch work to one side of the egg.
I have tried this without gluing and its doable, but makes it much harder.  So I highly suggest glue.

 This was my second attempt, so the fabric looks really bad.  I was having a hard time getting the stitching centered on the egg. That is why I highly reccomend glue. And for safe measure I used pins on the top, bottom and each side to help hold it in place.


Step 3: I'm sure you could use multiple things for this, but I used the paper clip. The goal is to stuff the fabric in the part of the egg you dug out. The end result looking like this. It does not have to look perfect. It will be covered up in the end.

Step 4: You now need to repeat the process of Step 2 and 3 for the other side. I used bring springy fabrics that I had in my stash.


This is what it should look like after both sides are all tucked in.


It will have a pretty ugly gap all the way around. so you need to find something that is wide enough to cover it.
I just hot glued some trim all the way around.


And the finished project:


I did a similar project last year as well. Not quite as pretty but you can see it hear.

Saturday, March 30, 2013

"Hoppy" Easter

I have been having fun with Easter projects this year.

Holiday Wreath: 
First up is my revamp of my Easter wreath. It is basically the same, all I did was put the blue ribbon on as well. I thought it brightened it up and made it a bit more fun.


Bunny Finger Puppets: 
Second project is my favorite. I was looking through my old Cross Stitcher Magazines for a good Easter project. I saw these and knew that they would be perfect!  I made a set for my niece Anna (the pink ones), and nephew David (the blue ones).  I let them play with them a few weeks ago and decided it would be a good little project to leave at my Moms house for the kids to play with when they are there.


I made a third set of bunnies for my nephew Magnus as well. I will be giving these to him tomorrow.

Now the coolest part about this project is I sent a picture to Cross Stitcher Magazine and they published it! I was so excited when I was looking through the latest issue and saw them! It was awesome.

Easter Ornament:
Third project was for a swap. We were assigned to make an Easter Ornament. I saw one of my friends on Facebook do this technique and I knew that I needed to try it. The pattern came out of an issue of Cross Stitcher Magazine (I'm not sure what issue, or I would say). I also love the trim that I found at Joann's one day.


I kept thinking of all these other projects that I wanted to do, but I never did. So next year I will have more.

Saturday, March 24, 2012

St. Patty's to Easter

I started with the Valentines wreath, but could not stop there. I had to make a St. Patty's wreath as well as an Easter one. I stuck with my burlap wreath and had some fun.

For my St. Patty's wreath I wanted to try a technique that me and my mom had tried years and years ago. I'm not thrilled on the way they turned out, but oh well, I didn't give myself much time to work with, so it had to do.

You use fabric wrapped wire, and bend it into the shape that you want. For me I did 4 leaf clovers. Then you glue them onto the fabric.  I used way too much glue, and it didn't turn out the way I really wanted, but it was fine. You then carefully cut them out, it was harder then I remembered.

Then I just used some long pins and pined them onto the wreath and wrapped it with some cute ribbon.

The Easter wreath I saw in Issue 250 of CrossStitcher. The bunnies were just too cute to pass up, I had to stitch them. They were super easy, and they kind of looked like little aliens while I was stitching them, it made me laugh.

I hooked everything onto little clips that I found in the jewelry department at my local Joann's. The clips on the bunnies are even Velcroed on so I can use the clips again for something else.


I used the bow from my Valentines wreath, and found some more cute pink ribbon. Out of the three wreaths I have made so far, this one is my favorite.