Now that I'm home all day I have a little time for stitching. I wanted to do a Spring/Easter project and I remembered that I had this sitting somewhere. I had everything I needed to finish it, so I dug it out.
The pattern came from Cross Stitch and Needlework Magazine / March 2013
The design is by Julia Lucas


As you can see, I finished them differently. Mainly because I hate stitching in white. It always turns out bad.
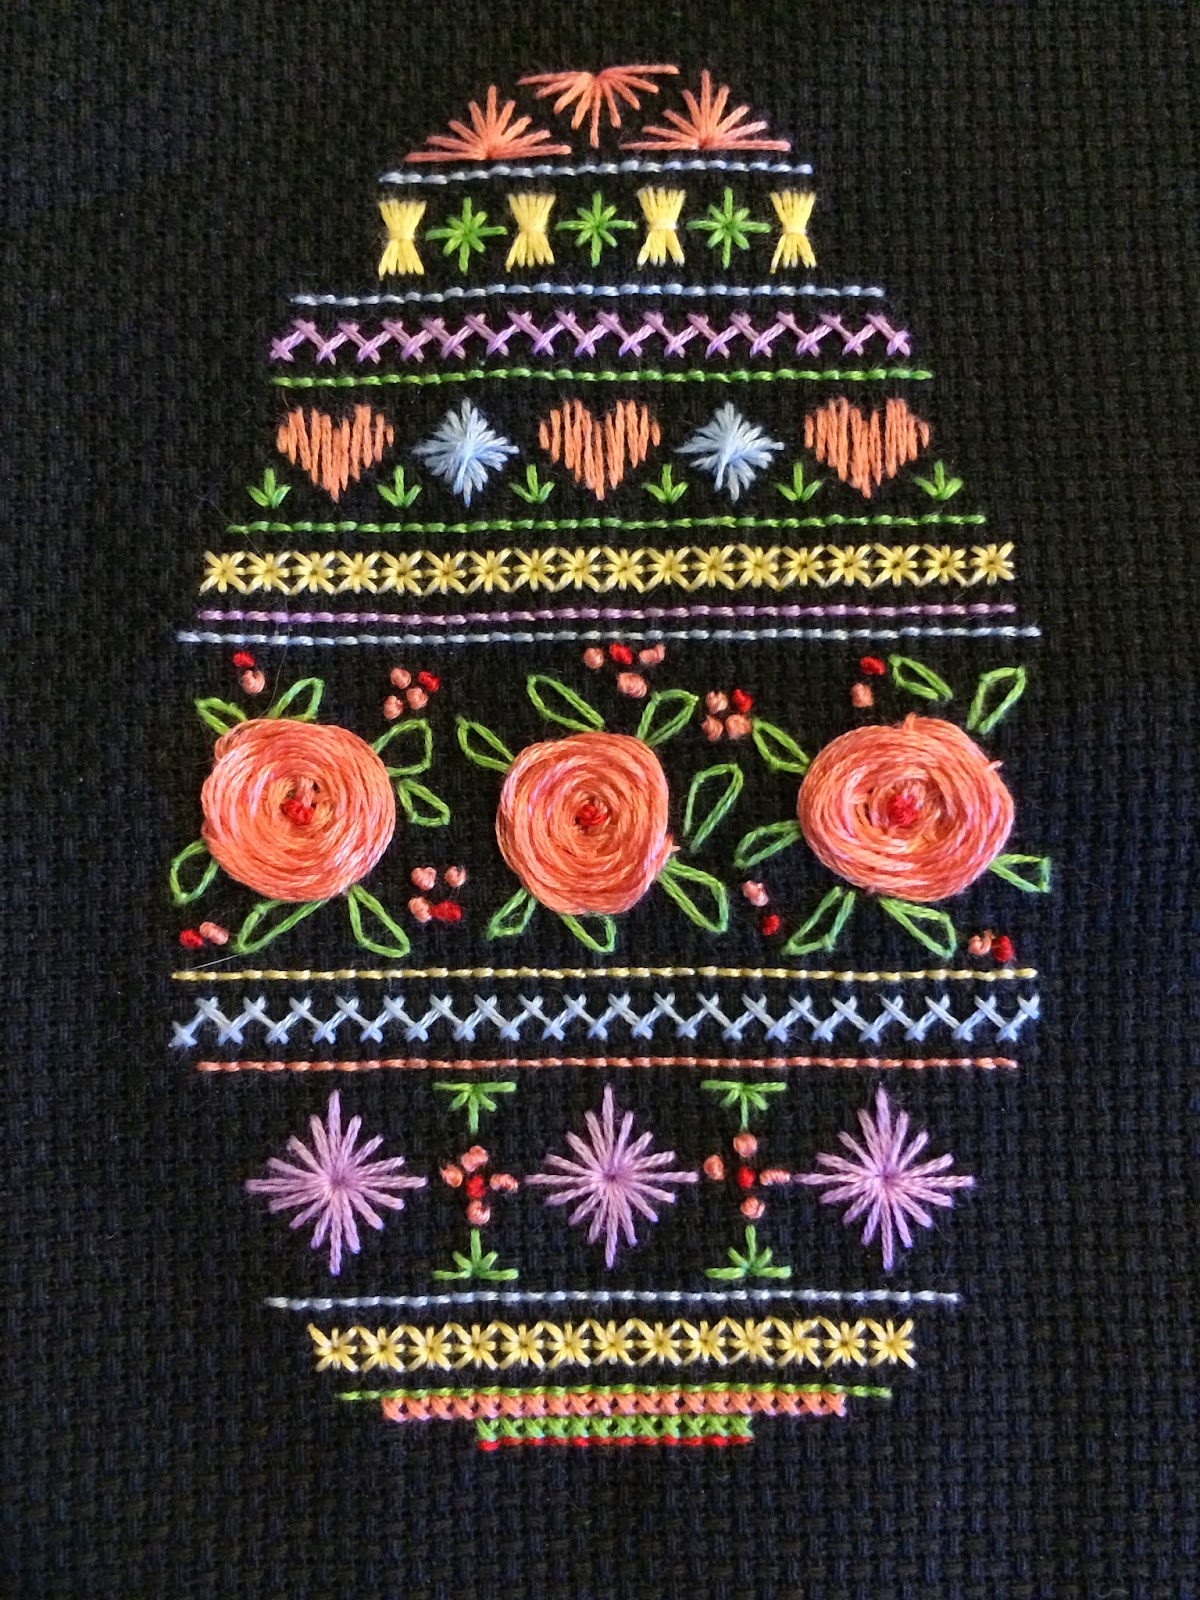
This is after I finished the stitching. They are so cool looking. I was drawn to this pattern because it was stitched on black.


 finishing them into 3D eggs was a pain to say the least.
 The tools I used:
1 - Styrofoam Egg
2 - Floss
3 - Pins
4 - Paper Clip
5 - Flat Head Screwdriver
6 - Pen
7 - (not pictured) Glue Stick
8 - (not pictured) Hot glue

Step 1: Take a piece of floss and draw a line around the egg. This gives a guide so you can punch out a portion of the egg with the screw driver. You can use whatever you want to do this, I've seen it done with an exact o knife as well. But the screwdriver worked pretty good.

Step 2: Use the glue stick and glue the stitch work to one side of the egg.
I have tried this without gluing and its doable, but makes it much harder. So I highly suggest glue.

 This was my second attempt, so the fabric looks really bad. I was having a hard time getting the stitching centered on the egg. That is why I highly reccomend glue. And for safe measure I used pins on the top, bottom and each side to help hold it in place.
Step 3: I'm sure you could use multiple things for this, but I used the paper clip. The goal is to stuff the fabric in the part of the egg you dug out. The end result looking like this. It does not have to look perfect. It will be covered up in the end.
Step 4: You now need to repeat the process of Step 2 and 3 for the other side. I used bring springy fabrics that I had in my stash.


It will have a pretty ugly gap all the way around. so you need to find something that is wide enough to cover it.
I just hot glued some trim all the way around.
And the finished project:
