Showing posts with label Cross Stitch and Needlework Magazine. Show all posts

Saturday, February 28, 2015

Egg-tastic

I've been working on this project for a while now. I honestly don't remember when I started it, but it ended up going into the unfinished pile.
Now that I'm home all day I have a little time for stitching. I wanted to do a Spring/Easter project and I remembered that I had this sitting somewhere. I had everything I needed to finish it, so I dug it out.

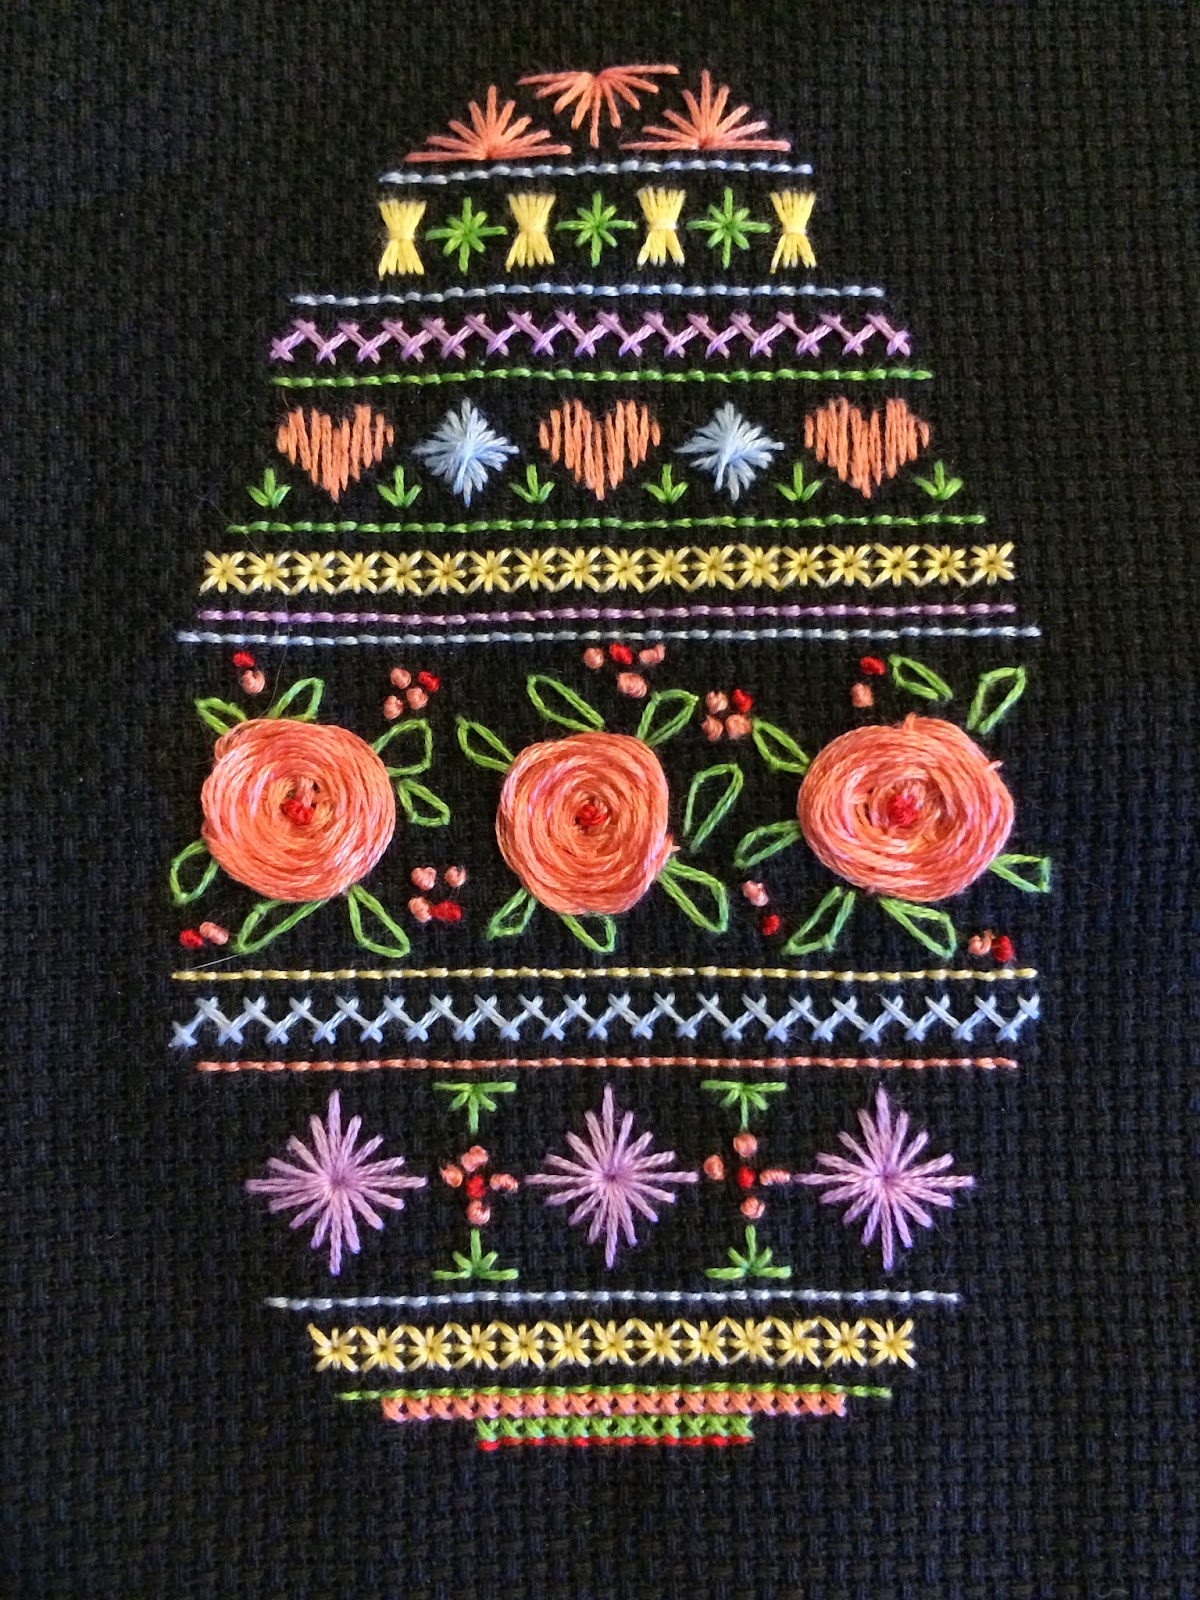
The pattern came from Cross Stitch and Needlework Magazine / March 2013
The design is by Julia Lucas


As you can see, I finished them differently. Mainly because I hate stitching in white. It always turns out bad.


This is after I finished the stitching. They are so cool looking.  I was drawn to this pattern because it was stitched on black.


finishing them into 3D eggs was a pain to say the least.
The tools I used:

1 - Styrofoam Egg
2 - Floss
3 - Pins
4 - Paper Clip
5 - Flat Head Screwdriver
6 - Pen
7 - (not pictured) Glue Stick
8 - (not pictured) Hot glue


 Step 1: Take a piece of floss and draw a line around the egg. This gives a guide so you can punch out a portion of the egg with the screw driver. You can use whatever you want to do this, I've seen it done with an exact o knife as well. But the screwdriver worked pretty good.


Step 2: Use the glue stick and glue the stitch work to one side of the egg.
I have tried this without gluing and its doable, but makes it much harder.  So I highly suggest glue.

 This was my second attempt, so the fabric looks really bad.  I was having a hard time getting the stitching centered on the egg. That is why I highly reccomend glue. And for safe measure I used pins on the top, bottom and each side to help hold it in place.


Step 3: I'm sure you could use multiple things for this, but I used the paper clip. The goal is to stuff the fabric in the part of the egg you dug out. The end result looking like this. It does not have to look perfect. It will be covered up in the end.

Step 4: You now need to repeat the process of Step 2 and 3 for the other side. I used bring springy fabrics that I had in my stash.


This is what it should look like after both sides are all tucked in.


It will have a pretty ugly gap all the way around. so you need to find something that is wide enough to cover it.
I just hot glued some trim all the way around.


And the finished project:


I did a similar project last year as well. Not quite as pretty but you can see it hear.

Sunday, January 26, 2014

New Year, New Technique


I had a whole Saturday where I did not have to do ANYTHING! No work, no shopping, nothing. (ok I cleaned the bathrooms, but that was it). So I decided to try something new!
I subscribe to Cross Stitch and Needlework Magazine. They have some awesome patterns, but they usually have a punch needle pattern in each issue. I finally decided to give it a go. I already had a punch needle, I had bought it months and months ago because I knew I wanted to try it eventually.

The latest issue had a really cute Spring/Valentines pattern. I decided it looked simple enough, and would be a good pattern to start out with.

Cross Stitch and Needlework Magazine also has a great website. They have a Tips and Techniques link, which is where I found instructions on punch needle. (they also have free patterns)

 The instructions say to use weavers cloth. I really don't know what that is, and I really didn't want to venture out to buy some. So, I just found some fabric in my stash of stuff. I figured it would work. It also said you need a hoop. Luckily I still had one plastic hoop stashed away. I don't normally use them anymore. I have some antique ones from my Grandma, but that is about it.

First I needed to transfer the patterns onto the fabric. The fabric was light enough that I just placed the fabric over the pattern and traced it on with my favorite tool ever, my fine point black sharpie, I never leave the house without it. I'm actually serious. Most of the time I have one in my purse.

If you noticed the pattern is backwards. With punch needle you work from the back of the project. That was something I didn't realize until I got started.

The actual needle is pretty cool too. The ones in pictures I had seen look different then the one I have, but its pretty slick. You use the long needle threader and pull the floss (2 or 3 strands, I used 3) through the tube, and then thread it trough a little hole at the hop of the needle. The process is really fast, which is nice, it does not slow you down to much when you have to stop and re-thread.

 The technique is super fast. That is why I was interested in punch needle to begin with. I read that you can finish a small project in 1-2 evenings. SOLD!
I did learn a few things as I went, the number one thing is to make sure your floss is not caught on anything as you go. I noticed when I was holding the needle I did not realize the floss coming out of the end of the needle was underneath my hand a lot, BAD! Don't let that happen, it was seriously frustrating because I did not realize it and was mad because it was not working right. I then figured it out why later on. It went a whole lots smoother once I figured that out.

Hear are a few progress shots..


This is the back after I was all done. The other thing I learned is pick a logical pattern to punch in and stick with it. It makes it much more neat, and makes it a lot less frustrating. You can tell I started with the grey, its more messy. I then moved to the A and B, not quite as messy, and then the C and the heart are A LOT better. I then did the little details like the flowers and the hearts. And then in the end filled in the white.
The other thing about punch needle, it uses TONS of floss. I used about a skein and a half of white. I also used all the grey I had in my stash.

In the end I think it turned out pretty cute. Its by no means perfect! And I had to do a little trimming hear and there because of snags and other things. But for a first try I think I did alright. I definitely learned a lot along the way. And the next project will be better.

How am I going to finish this off? I have no idea. I think I want to use it on my Valentines wreath somehow. I will post again with the results.

Happy punching!